Donnerstag, 25. Dezember 2014
Merry Presents Day!
I wish you all a lovely winter solstice celebration of your choice, and may you be richly gifted with everything you wish for!

Dienstag, 16. Dezember 2014
Baby Overall
So, once you've found a pattern that you're happy with, that you've got the hang of sewing, that fits pretty well and lends itself to all kinds of fun decoration, what's the next logical step?
Change it, of course!
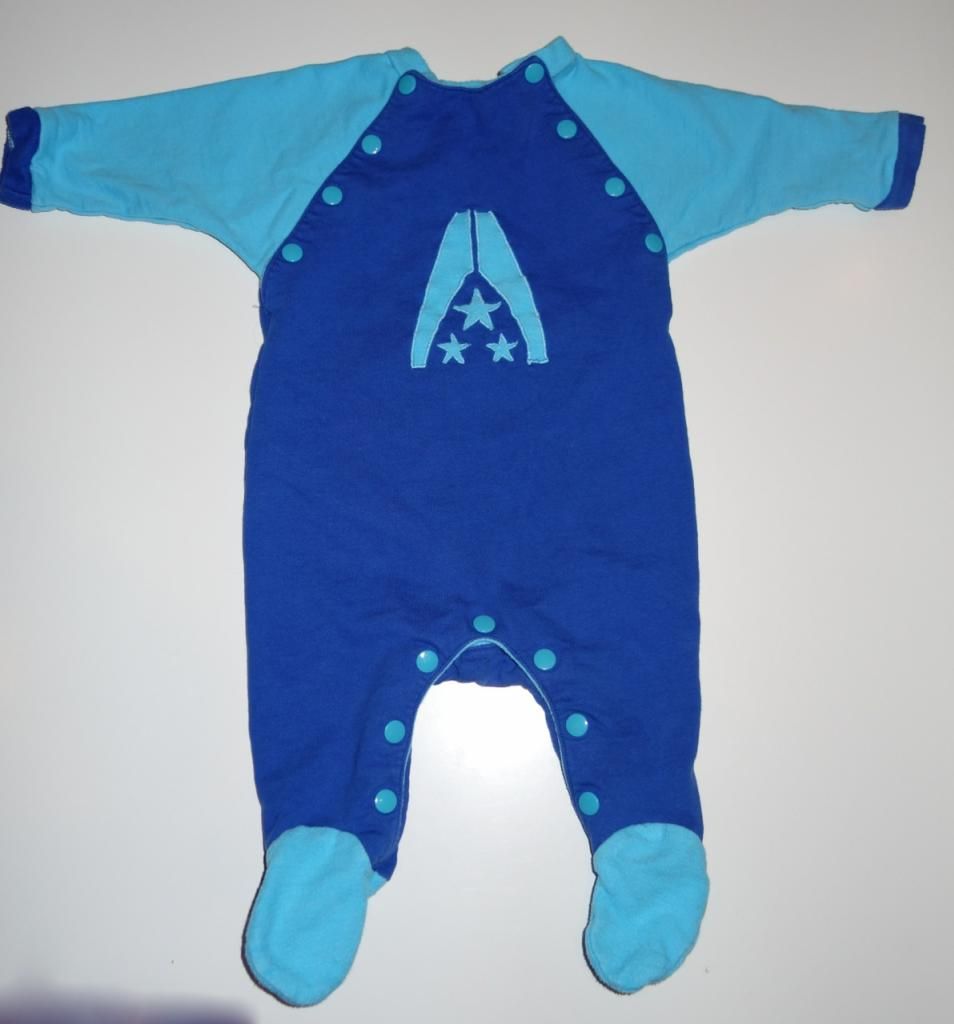
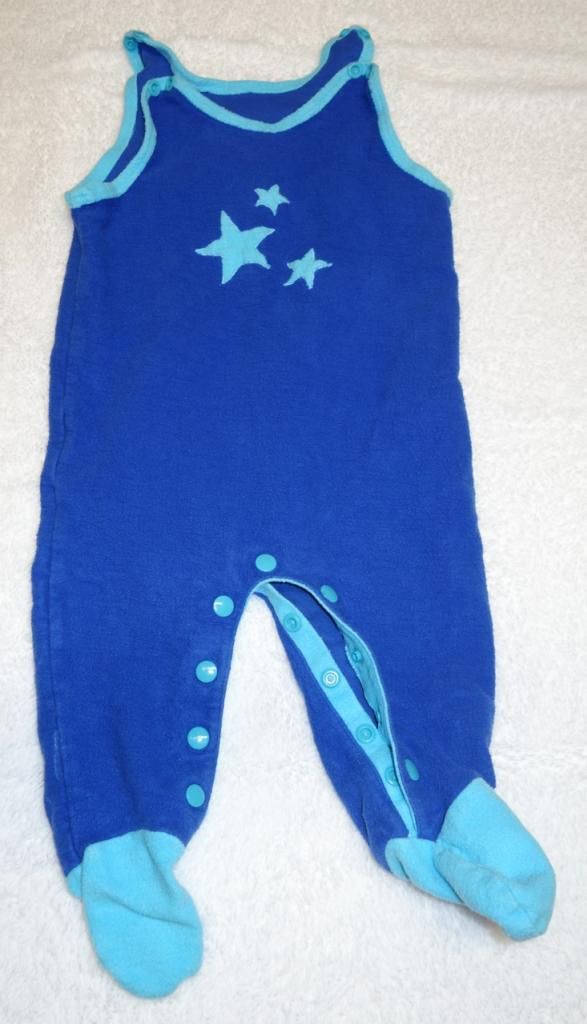
Because happy though I am with the two buttoned rompers, in the depths of my baby-clothes-I-was-given-by-lovely-people box, I found something even better: a romper with buttoned legs and sleeves!

Now I know you're probably bouncing in your chair, squealing with excitement over this game changing discovery, so I won't keep you in suspense for much longer. I didn't want to cut this one up, so I did my best to reverse-engineer it into a sewing pattern, and the result:

I like it. A lot. If it handles well in daily use, this may actually become my go-to baby garment. The pattern still needs some fine tuning, but luckily I have accumulated roughly a bajillion different baby compatible fabrics to experiment with.
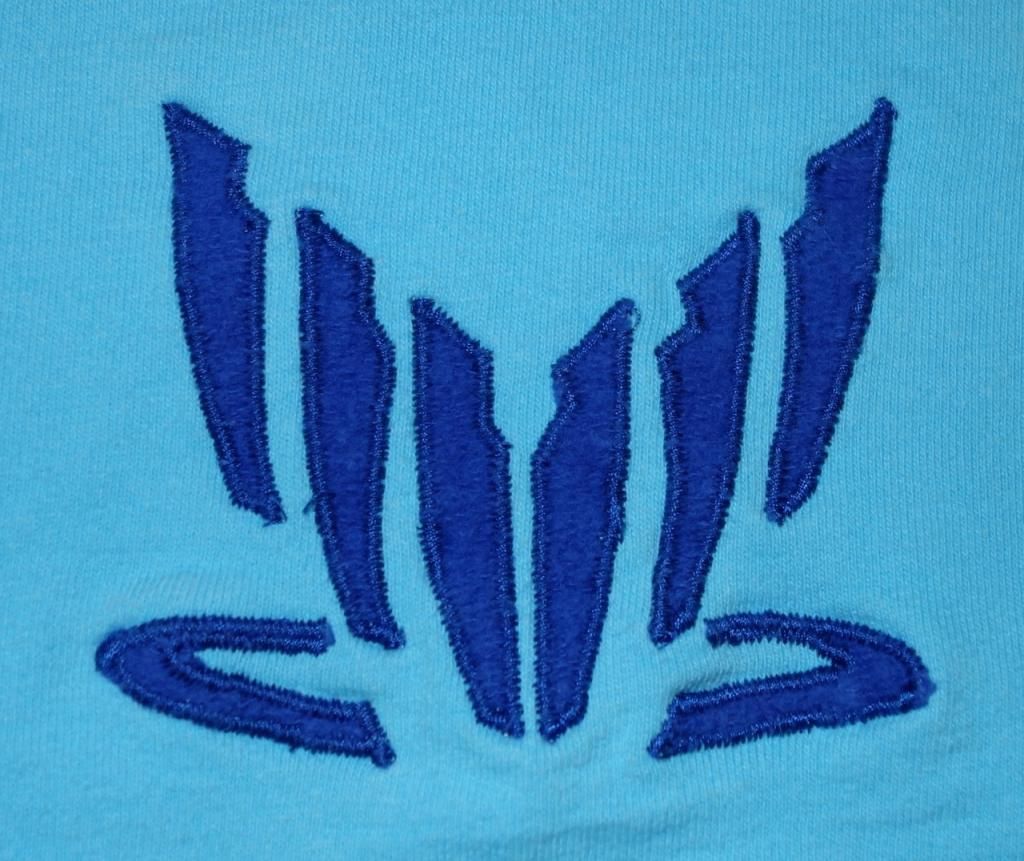
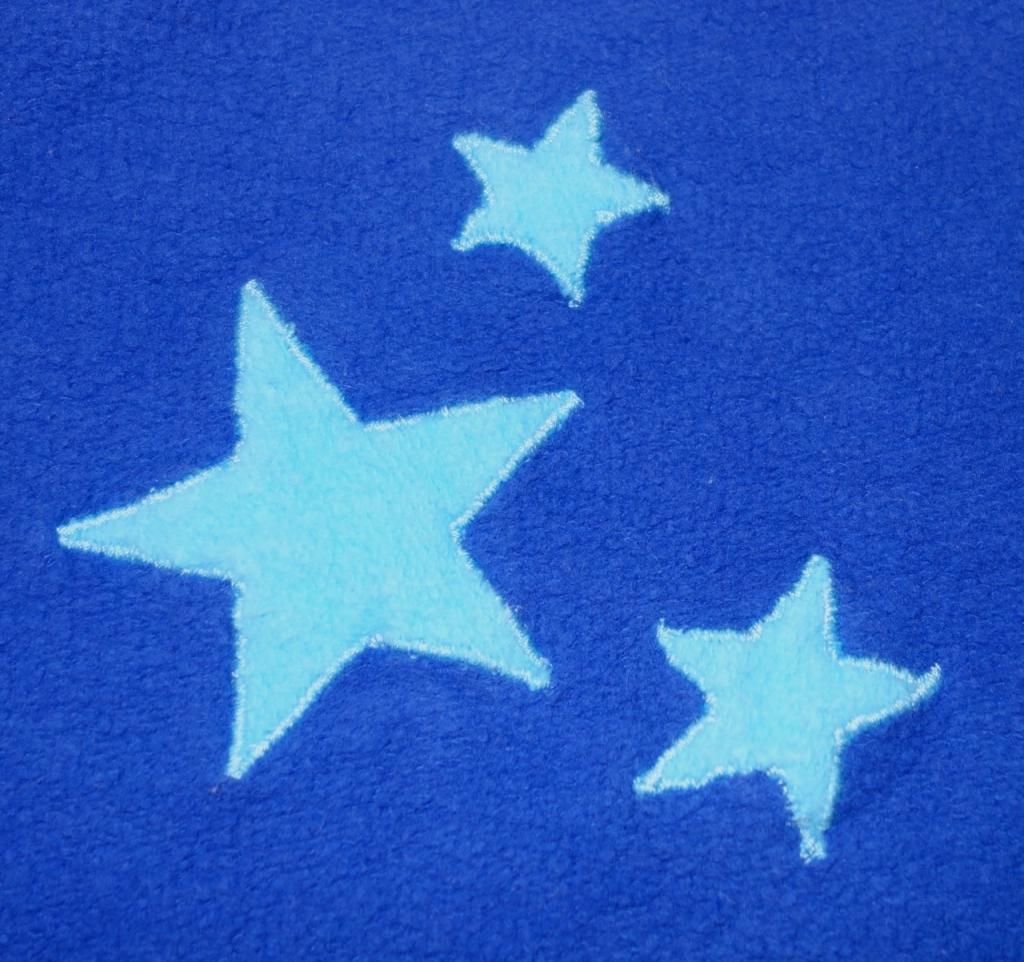
And as an aside, will you look at these stars?

Aren't they delightfully pointy? (In some places at least...) I experimented with reducing the stitch width around the points, and I'm quite happy with the result.
So in conclusion: Success!
Pattern: My own
Fabric: Sweat (buttinette)
Buttons: Kam Snaps (snaply Nähkram)
Change it, of course!
Because happy though I am with the two buttoned rompers, in the depths of my baby-clothes-I-was-given-by-lovely-people box, I found something even better: a romper with buttoned legs and sleeves!

I like it. A lot. If it handles well in daily use, this may actually become my go-to baby garment. The pattern still needs some fine tuning, but luckily I have accumulated roughly a bajillion different baby compatible fabrics to experiment with.
And as an aside, will you look at these stars?

Aren't they delightfully pointy? (In some places at least...) I experimented with reducing the stitch width around the points, and I'm quite happy with the result.
So in conclusion: Success!
Pattern: My own
Fabric: Sweat (buttinette)
Buttons: Kam Snaps (snaply Nähkram)
Mittwoch, 10. Dezember 2014
Mittens
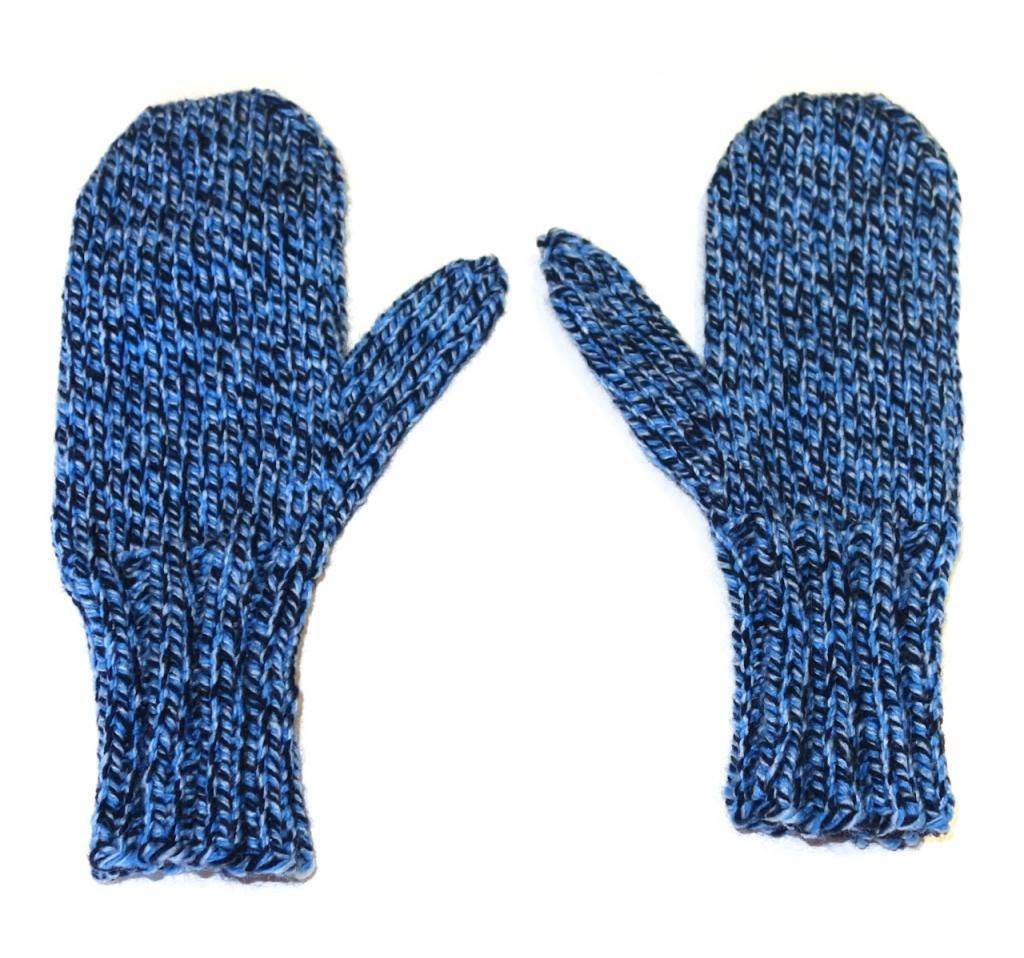
Lately it’s been getting mighty cold outside (or so it seems to my should-have-reincarnated-in-Australia self). So I finally dug the winter accessories out from the attic, and promptly dug them back in when I realized that nothing fit anymore. Which is, of course, the best possible excuse anyone could wish for hunkering down with some knitting:

Found a nice and simple pattern on Ravelry that I followed pretty much exactly (except I changed the tip of the mittens to one I liked better. And I skipped out on the single increase at the beginning of the palm, because I didn’t see the point and I like my stitches to be nice and symmetrically distributed on the needles. But other than that, pretty much exactly) and now at least kid1 will have warm hands for one more season.
They knit up pretty quickly, too - the second mitten was knit almost entirely while watching Catching Fire (which, by the way, I enjoyed every bit as much as the first movie; Plutarch was really great and I absolutely fell in love with Johanna), so as knitting goes, that was pretty much instant gratification.
My conclusion: Success!
Pattern: Ravelry Classic Mittens
Yarn: Red Heart Lisa (Colour Ozean Mouline)
Montag, 1. Dezember 2014
Christmas Season is Coming...
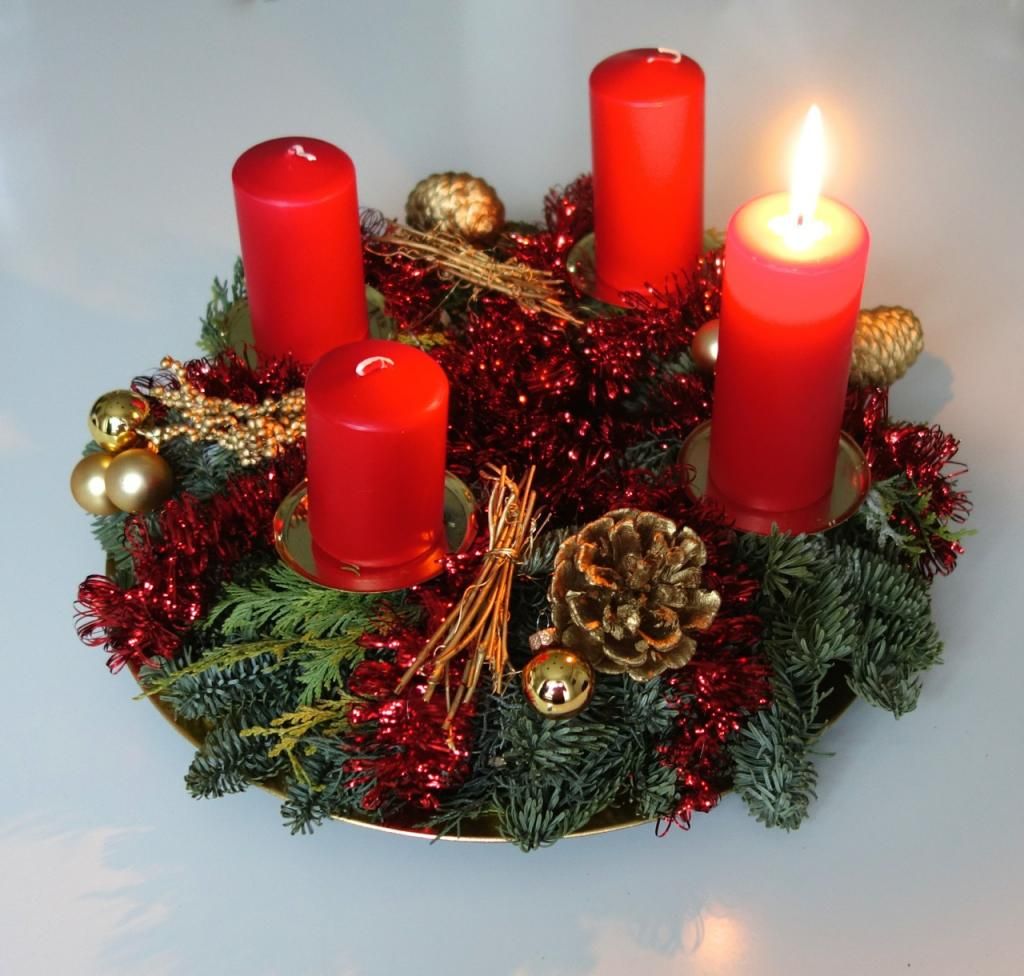
And just in time for the first Sunday of Advent (Sunday morning, to be precise), I got it done:

Our Christmas colours this year are once again red and gold (when I ask the boyfriend, it always is red and gold). And I admit it kind of looks like I phoned it in this year, but that was really all the creative fulmination I could manage.
But kid1 seems to like it and the cats always enjoy the All You Can Eat salad bar, so I’m happy :-)
Montag, 24. November 2014
Another Romper
So, remember how I said I wanted to practice some appliqué? Well. When you decide to get the hang of a skill like that, there are two ways to go about it: you can start with something simple and work your way up, making yourself feel successful and accomplished all the way. Or you just dive into something small and fussy and hope it doesn't turn into a complete mess.
Guess what I did?

Yeah, well. Pacing myself is not one of my talents. And while the learning curve was pretty steep, I did figure out quite a few things that were giving me trouble.
And if you don't look too closely

It almost doesn't look like a mess at all. My conclusion: Success!
Fabric: Sweat (buttinette)
Buttons: Kam Snaps (snaply Nähkram)
Pattern: Burda 9636
Appliqué design: Titch-IX
Guess what I did?
Yeah, well. Pacing myself is not one of my talents. And while the learning curve was pretty steep, I did figure out quite a few things that were giving me trouble.
And if you don't look too closely

It almost doesn't look like a mess at all. My conclusion: Success!
Fabric: Sweat (buttinette)
Buttons: Kam Snaps (snaply Nähkram)
Pattern: Burda 9636
Appliqué design: Titch-IX
Samstag, 15. November 2014
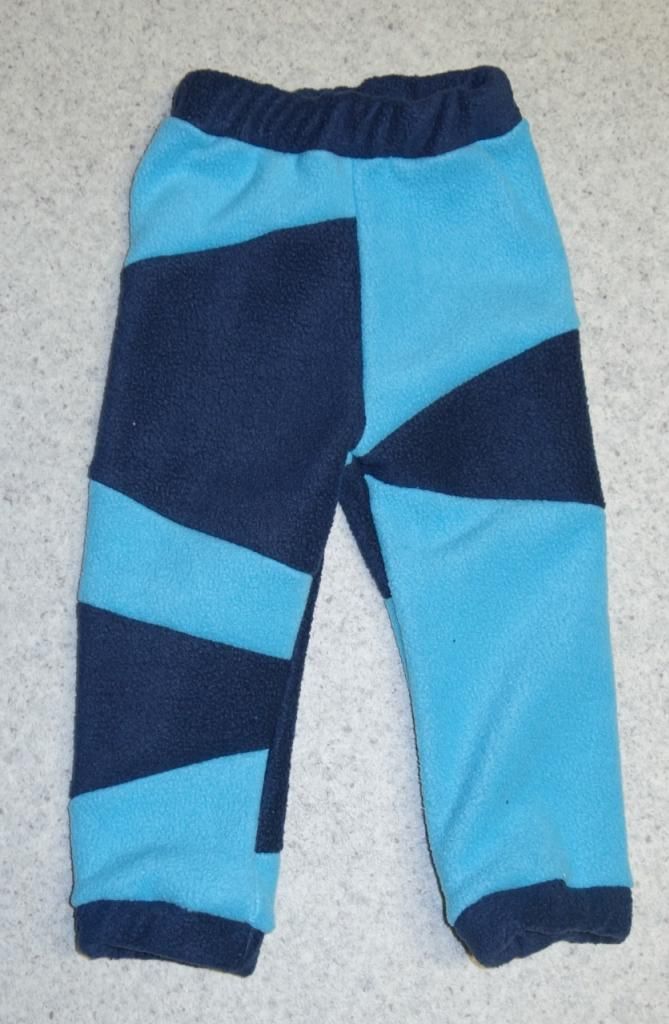
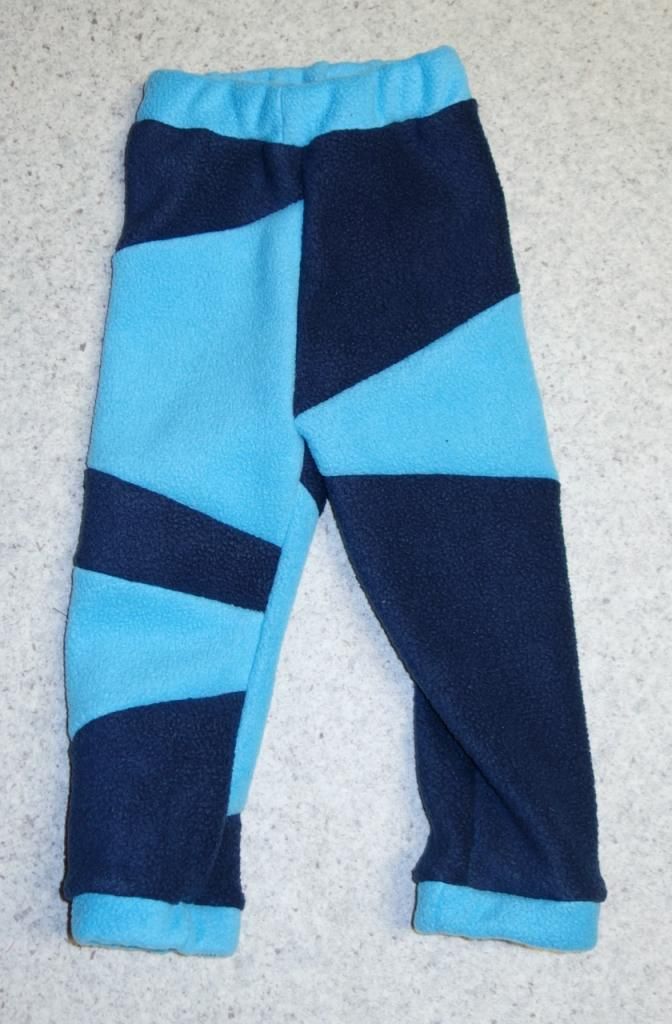
Patchwork Pants
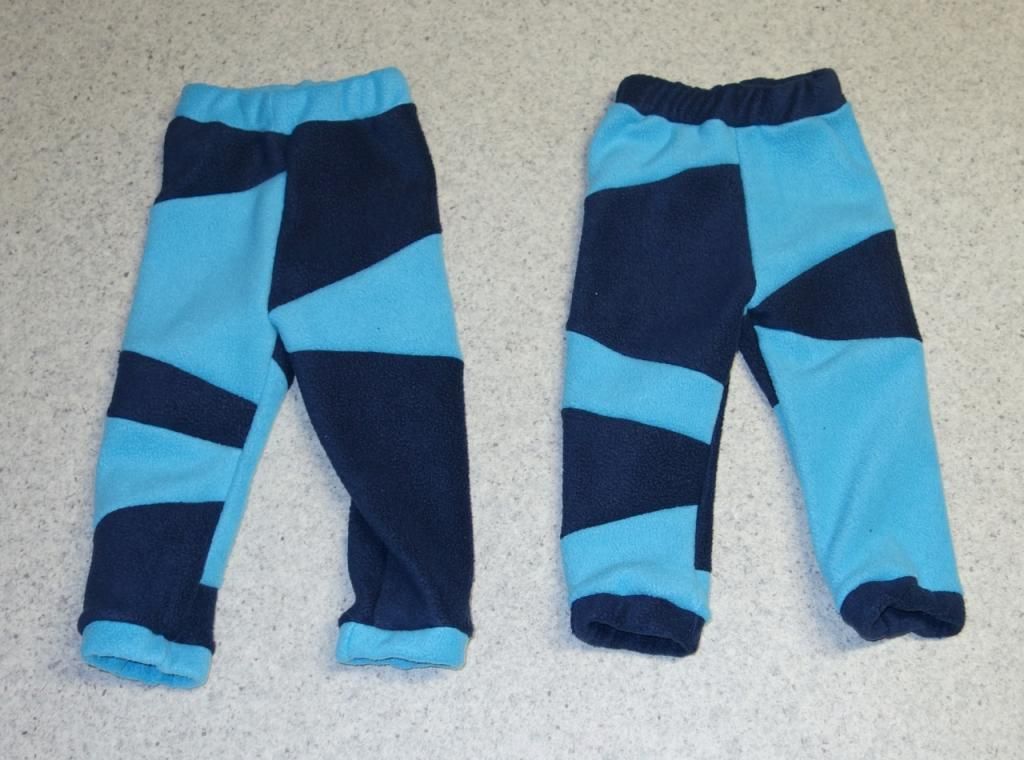
Not just the baby is growing, but kid1 is also getting longer by the week. And since the weather is getting undeniably colder, it was time for some going-outside pants for autumn. Since I didn't want them to look entirely boring, I experimented a little and the result:
 Looks kind of nice, I think.
Want to make some of your own? Here's how:
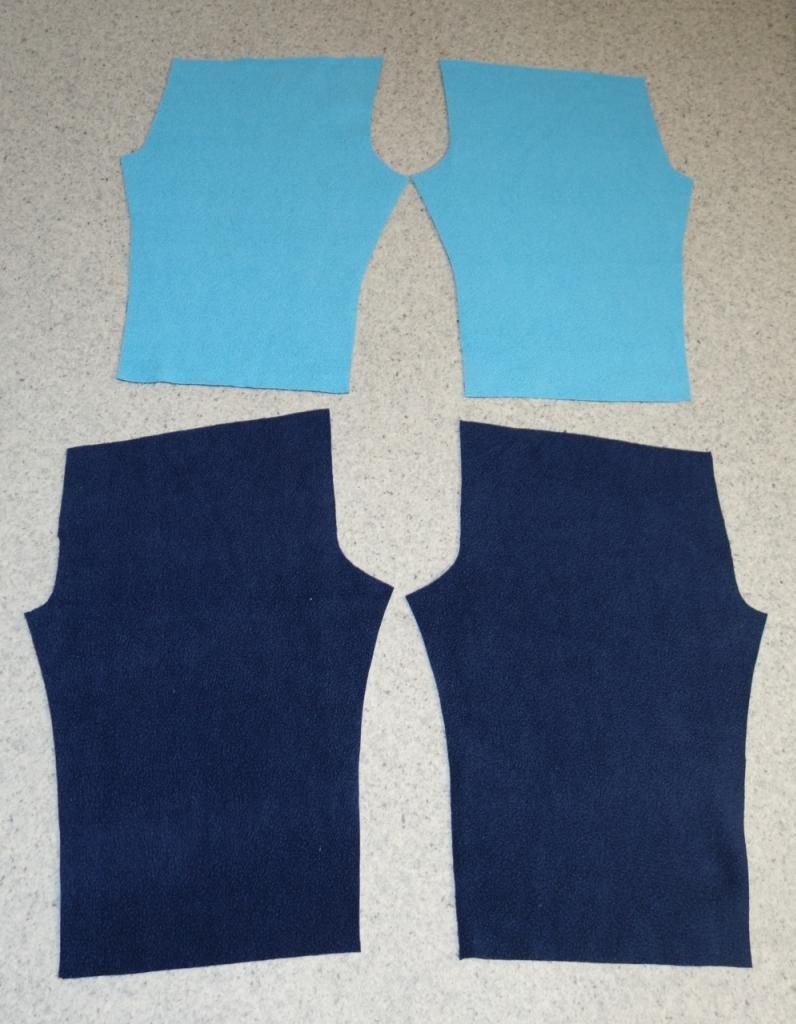
1. Take a sewing pattern for a fitting pair of pants. If you don't have one handy, there's a nice one here. Or take a pair of store-bought pants apart to make your own pattern (mine comes from some store-bought pyjama bottoms).
2. Take two fabrics with similar materials and properties. I used a double-sided fleece with the front side as fabric1 and the back side as fabric2.
3. Cut one complete pair of pants from each fabric. Note, though: since we'll be cutting and sewing up the individual pieces, we will lose some length. This we have to add during the initial cut. So estimate beforehand how many patchwork cuts you intend to make, and lengthen the legs by the appropriate amount of seam allowance.
Example: I usually sew with about 0.5 cm (3/16 in) of seam allowance. I want five patchwork stripes, so I lengthen the leg by 4 * 2 * 0.5 cm = 4 cm (4 * 2 * 3/16 in = 1.5 in).

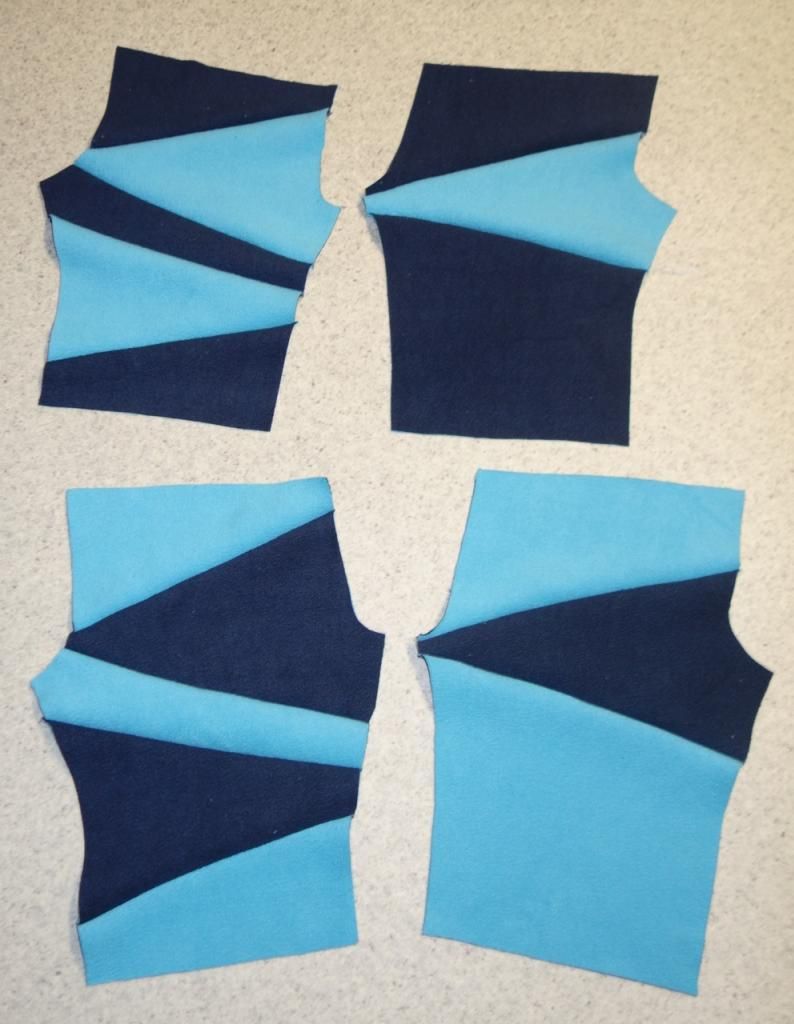
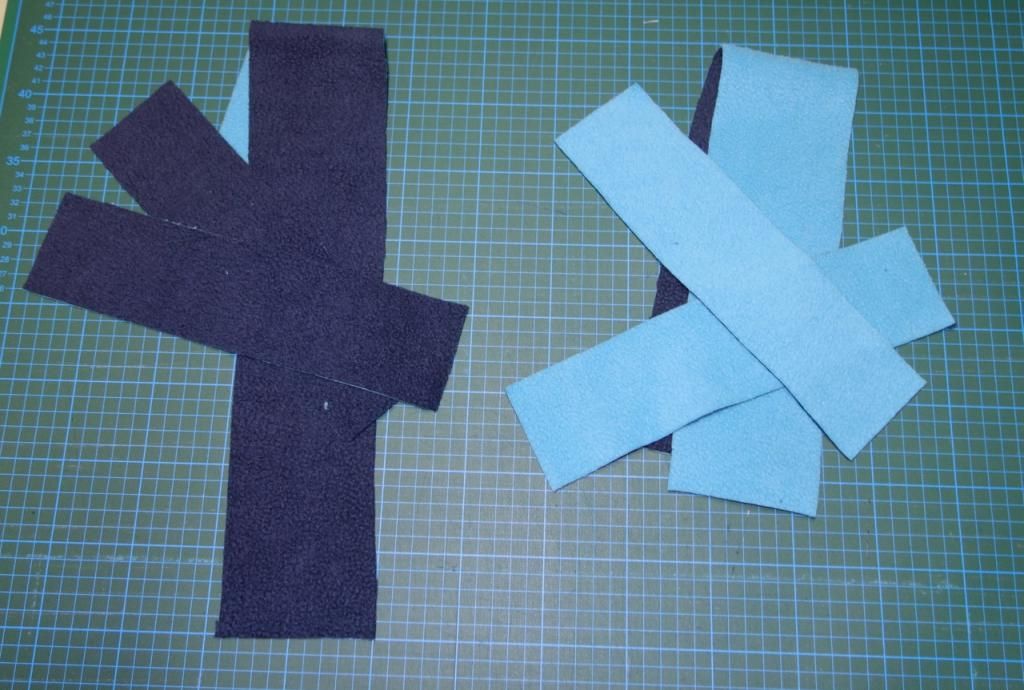
4. Stack the corresponding pattern peaces, placing the right leg of fabric1 on the right leg of fabric2.
5. Now cut your patchwork pieces, but try not to make them too narrow - they should be at least 3/8 in + seam allowances wide, so you won't have trouble sewing them up later.
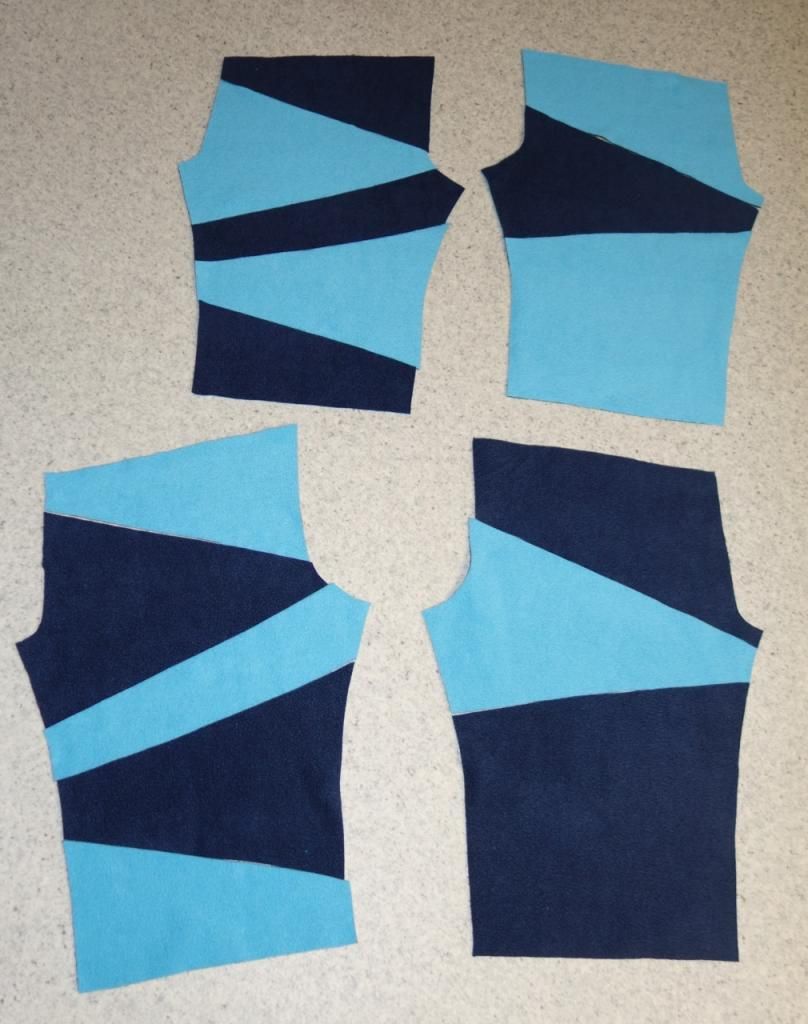
 6. Separate the cut pieces
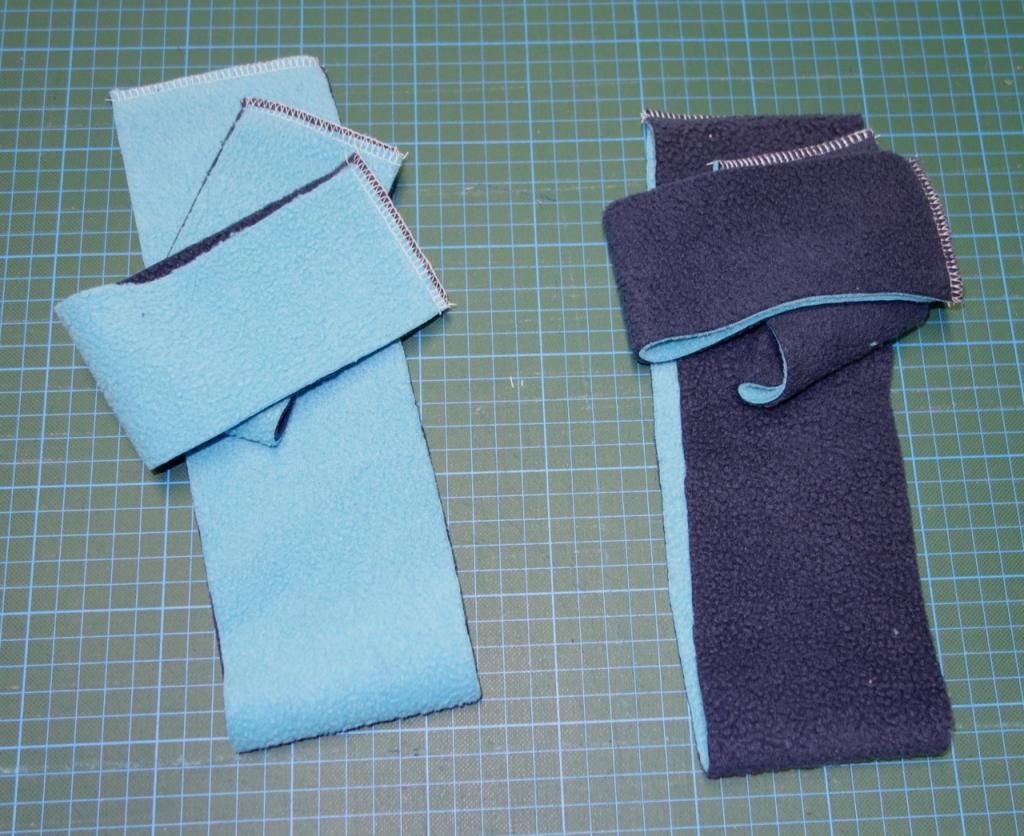
7. and reassemble them

8. If there are a lot of pieces, it may be helpful to mark them so you know how they are supposed to fit together.

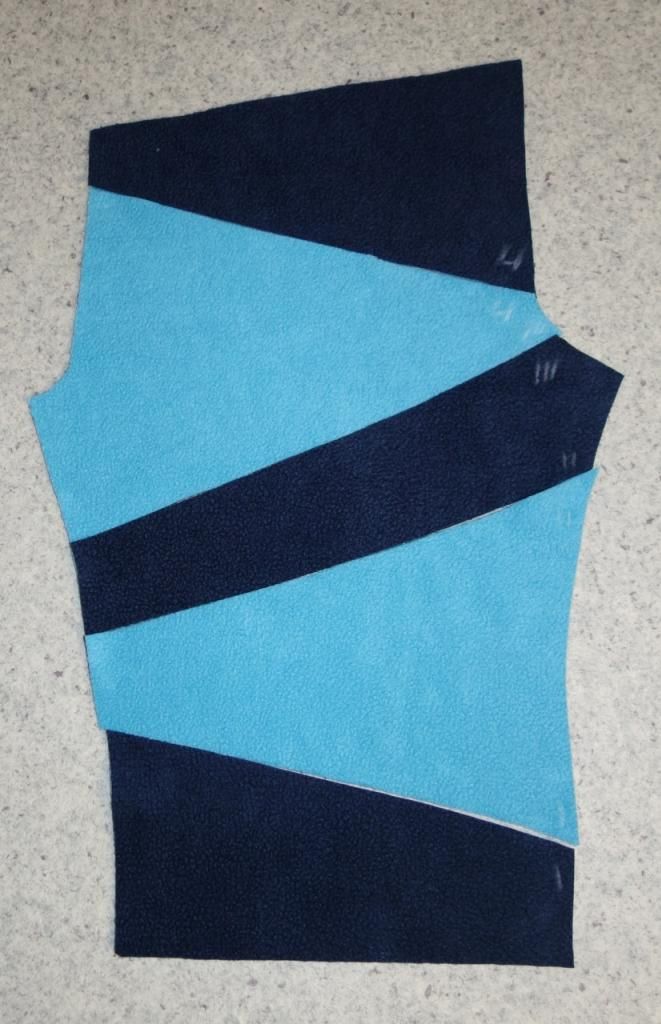
9. Sew the pieces together, neatening the edges if necessary, until you once again have four complete trouser legs.
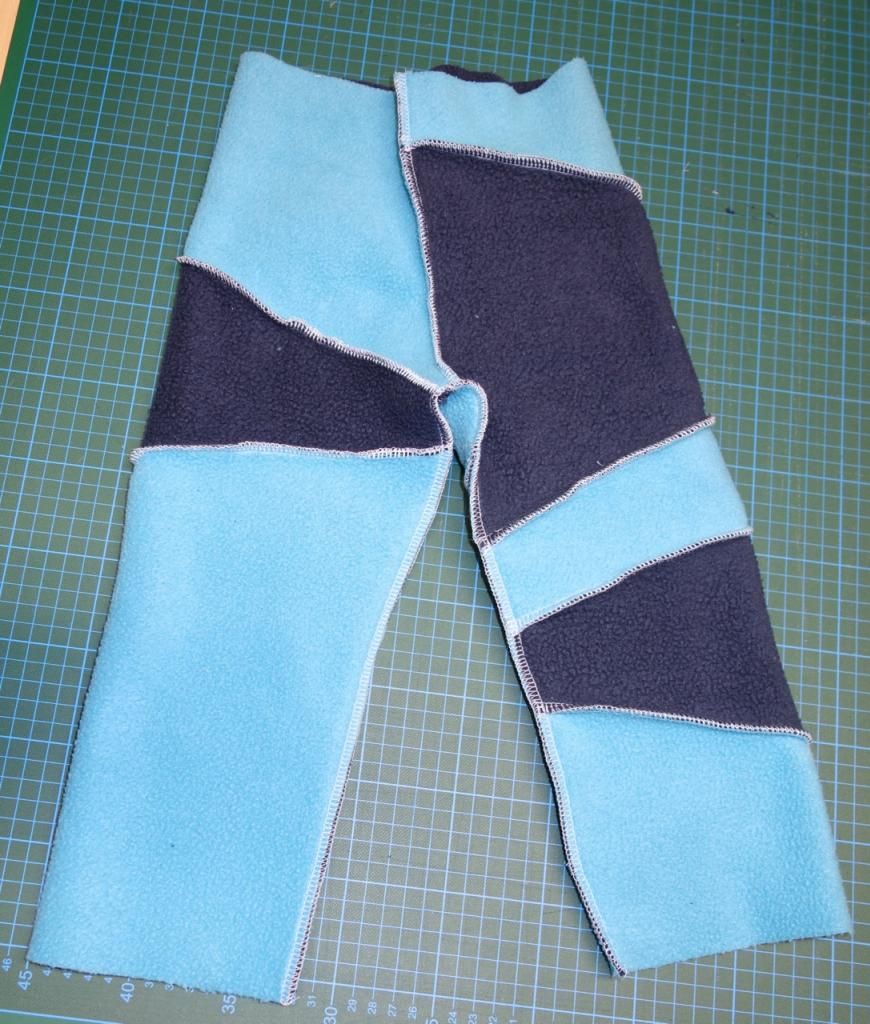
10. Decide which right should go with which left leg. I chose this combination:

Now you can finish up the pants in the way you prefer. This is how I do it:
11. Stack the right and left leg with the right sides facing each other
12. Close the front and back middle seam

13. Close the leg seams in one go from one ankle to the other

14. For the cuffs I'm using the same fabric as for the legs. I use an elastic band, so I don't necessarily need cuff fabric.
15. Cut the cuffs so they are as long as the corresponding pattern pieces plus seam allowance. I prefer broad cuffs, so I'm cutting them 7 cm (3 in) wide for the ankles and 9 cm (3.75 in) for the waist.

16. Fold over the pieces with right sides facing inwards to close the seam to make a circle.

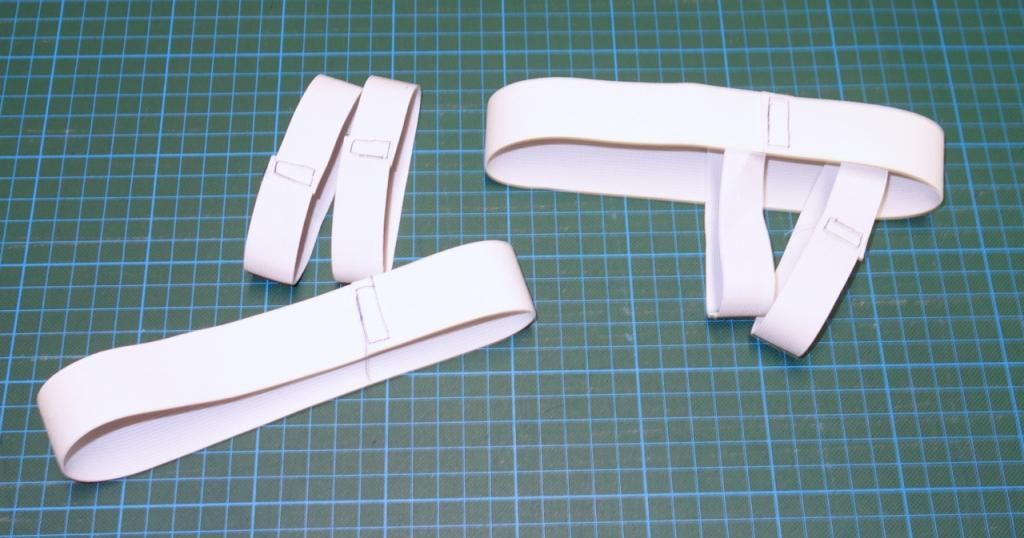
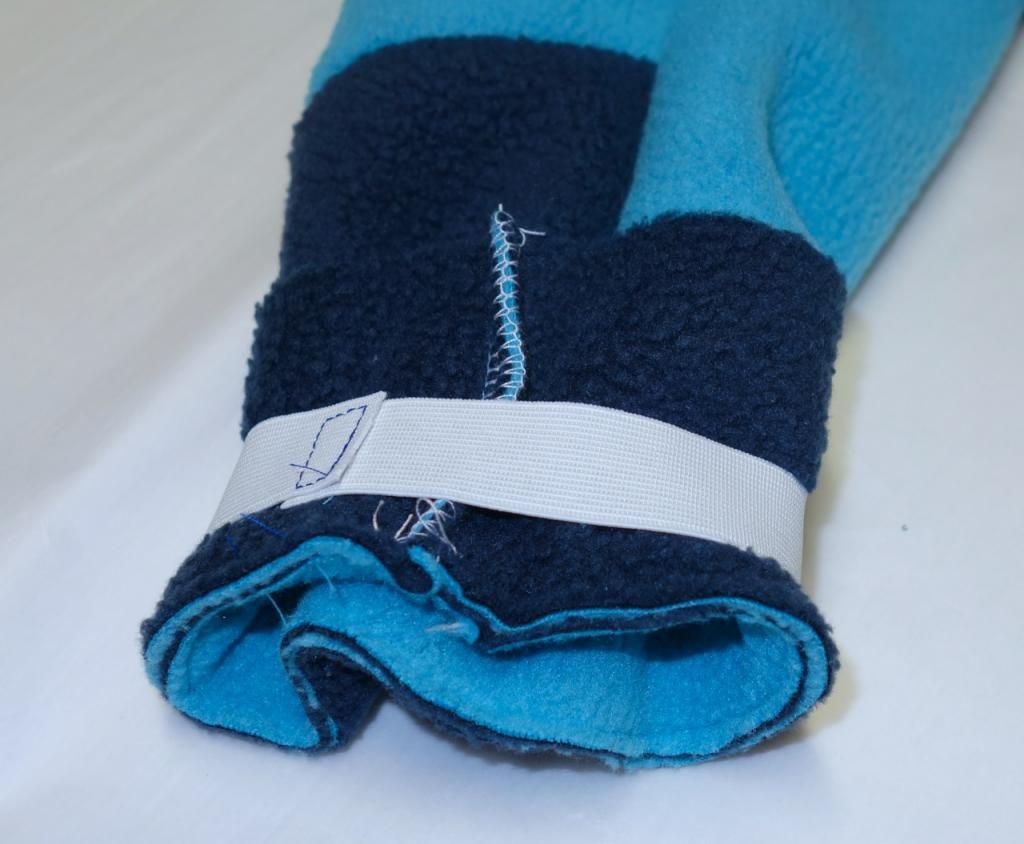
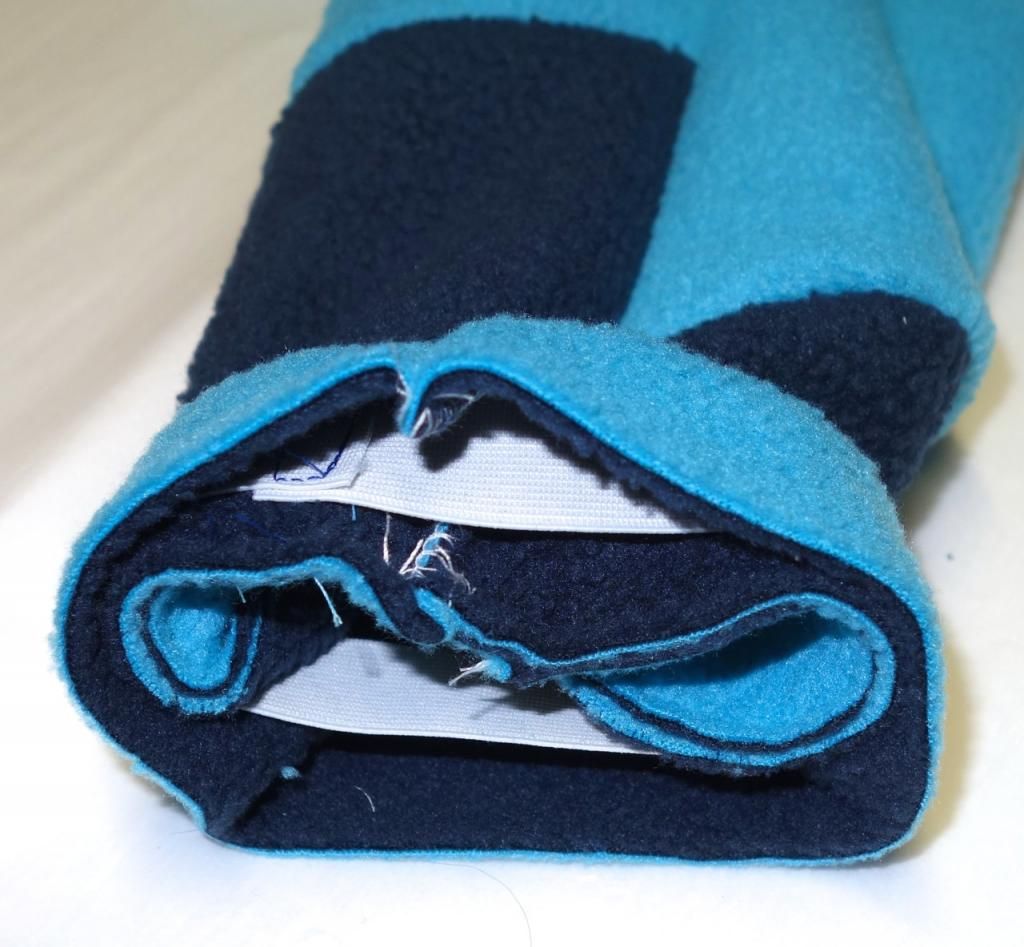
17. Take elastic band in a matching width - I use 3 cm (1.25 in) for the ankles and 4 cm (1.75 in) for the waist. Cut therequired lengths; if you don't have measurements handy, use a pair of well fitting pants for reference.
18. Close the elastic bands into circles.

19. To attach the cuffs, first turn the pants right side out. Then place the cuffs on the pants with the right sides facing inward. Now you can fix them in place with pins, or do it my way and sew them in place close to the edge. That almost guarantees that later you'll catch all the layers and nothing moves out of place.

20. Now pull the elastic rings on the cuffs.

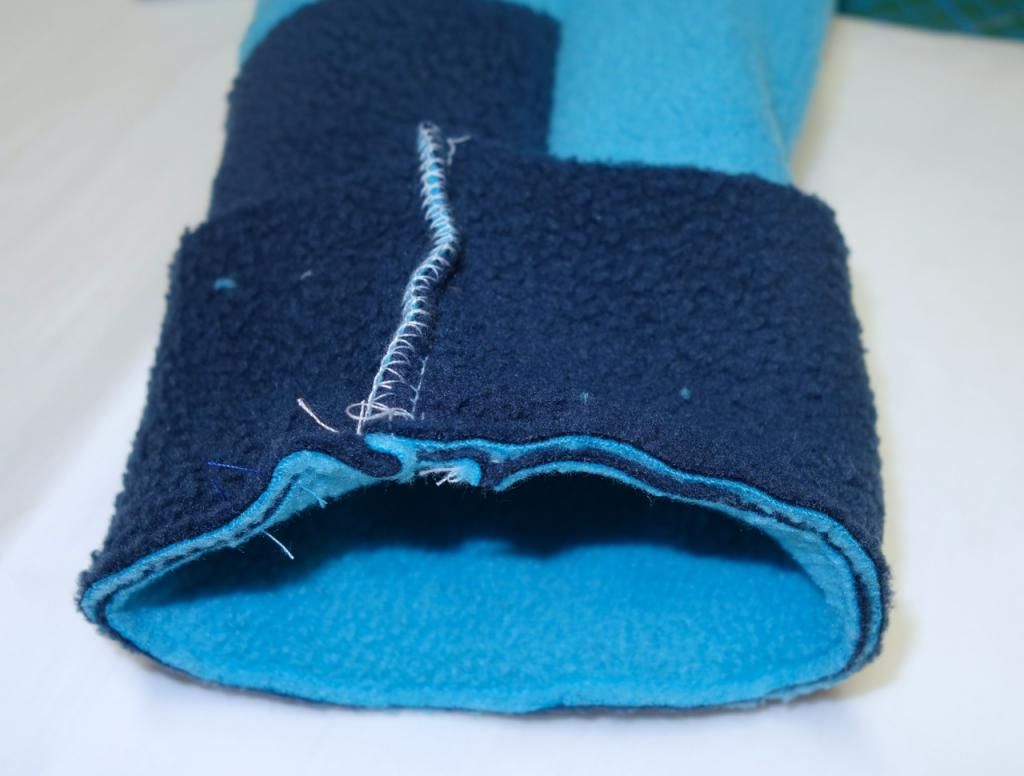
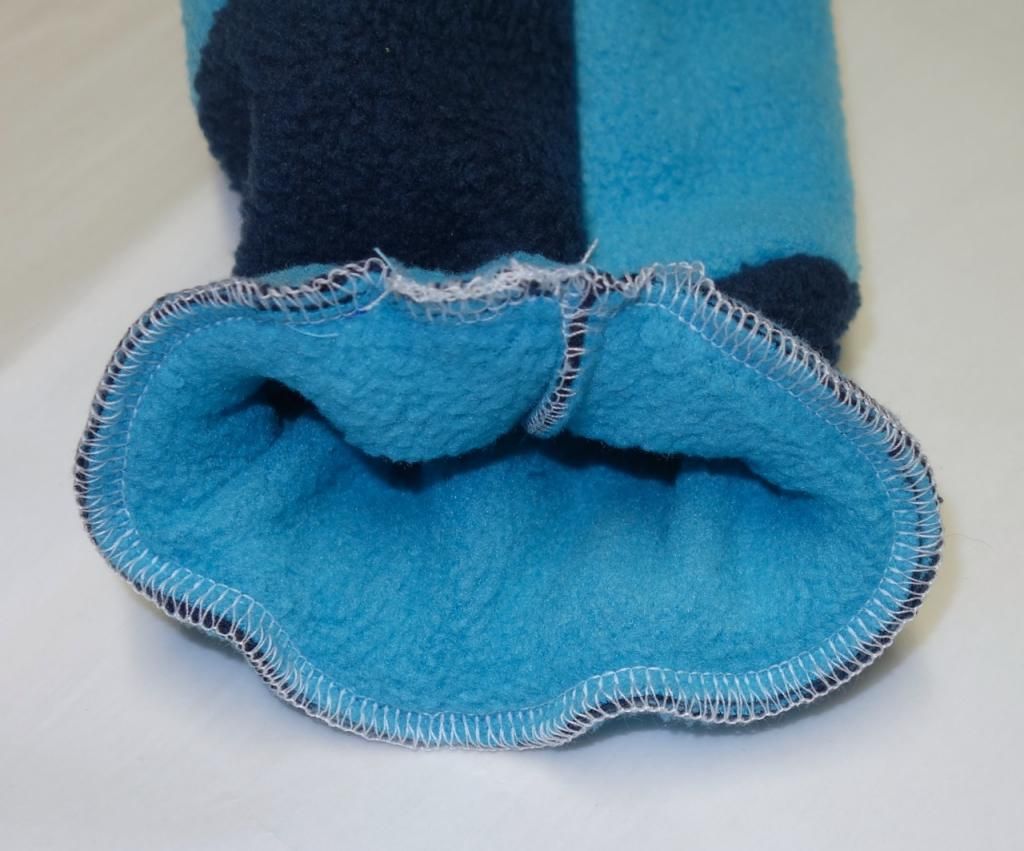
21. Fold over the cuff

22. and sew up around the edge.

23. Something I like to do at the back of the waist is to insert a scrap of fabric with the size stitched on.
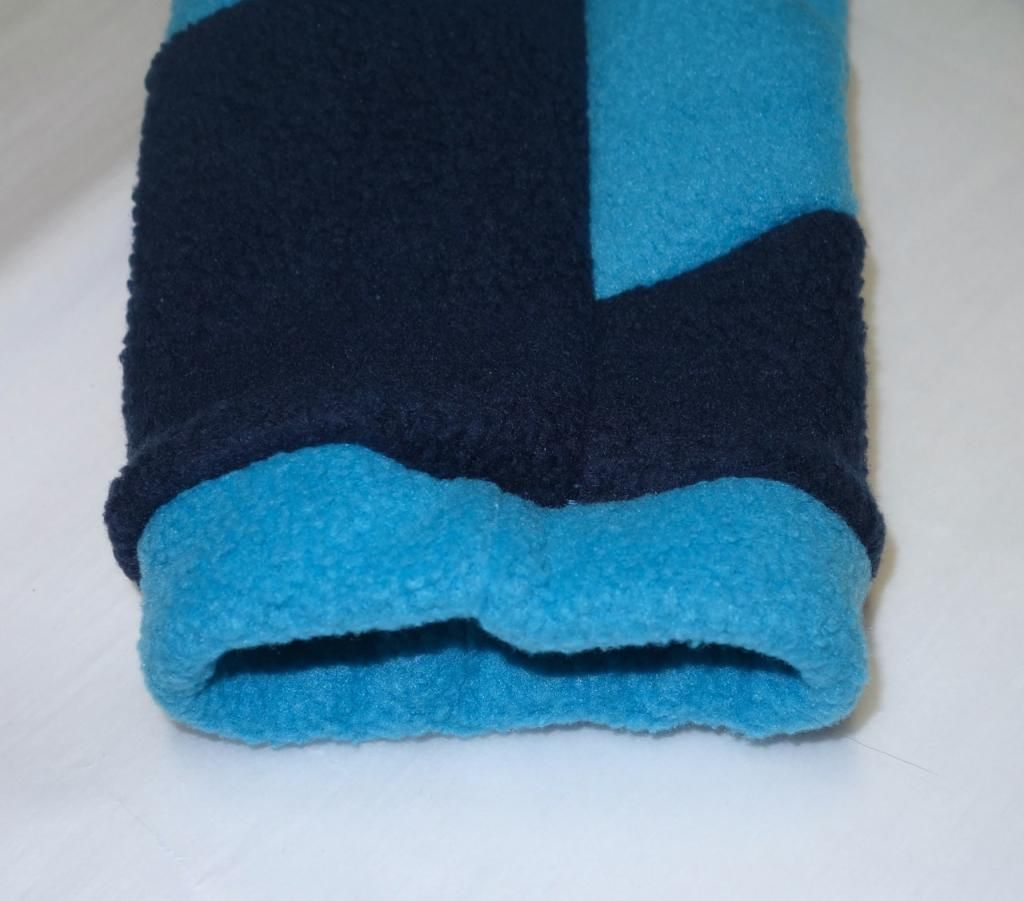
24. Fold down the cuffs and voilà!

Two unique and individual patchwork pants.


Of course you can also do this with three or more fabrics, which will give you three or more pairs of pants.
If you have any questions about this tutorial, I'll be happy to answer them. And if you decide to sew some patchwork pants, I'd love to see them!
Until then have fun, and happy sewing :-)
Want to make some of your own? Here's how:
1. Take a sewing pattern for a fitting pair of pants. If you don't have one handy, there's a nice one here. Or take a pair of store-bought pants apart to make your own pattern (mine comes from some store-bought pyjama bottoms).
2. Take two fabrics with similar materials and properties. I used a double-sided fleece with the front side as fabric1 and the back side as fabric2.
3. Cut one complete pair of pants from each fabric. Note, though: since we'll be cutting and sewing up the individual pieces, we will lose some length. This we have to add during the initial cut. So estimate beforehand how many patchwork cuts you intend to make, and lengthen the legs by the appropriate amount of seam allowance.
Example: I usually sew with about 0.5 cm (3/16 in) of seam allowance. I want five patchwork stripes, so I lengthen the leg by 4 * 2 * 0.5 cm = 4 cm (4 * 2 * 3/16 in = 1.5 in).
4. Stack the corresponding pattern peaces, placing the right leg of fabric1 on the right leg of fabric2.
5. Now cut your patchwork pieces, but try not to make them too narrow - they should be at least 3/8 in + seam allowances wide, so you won't have trouble sewing them up later.
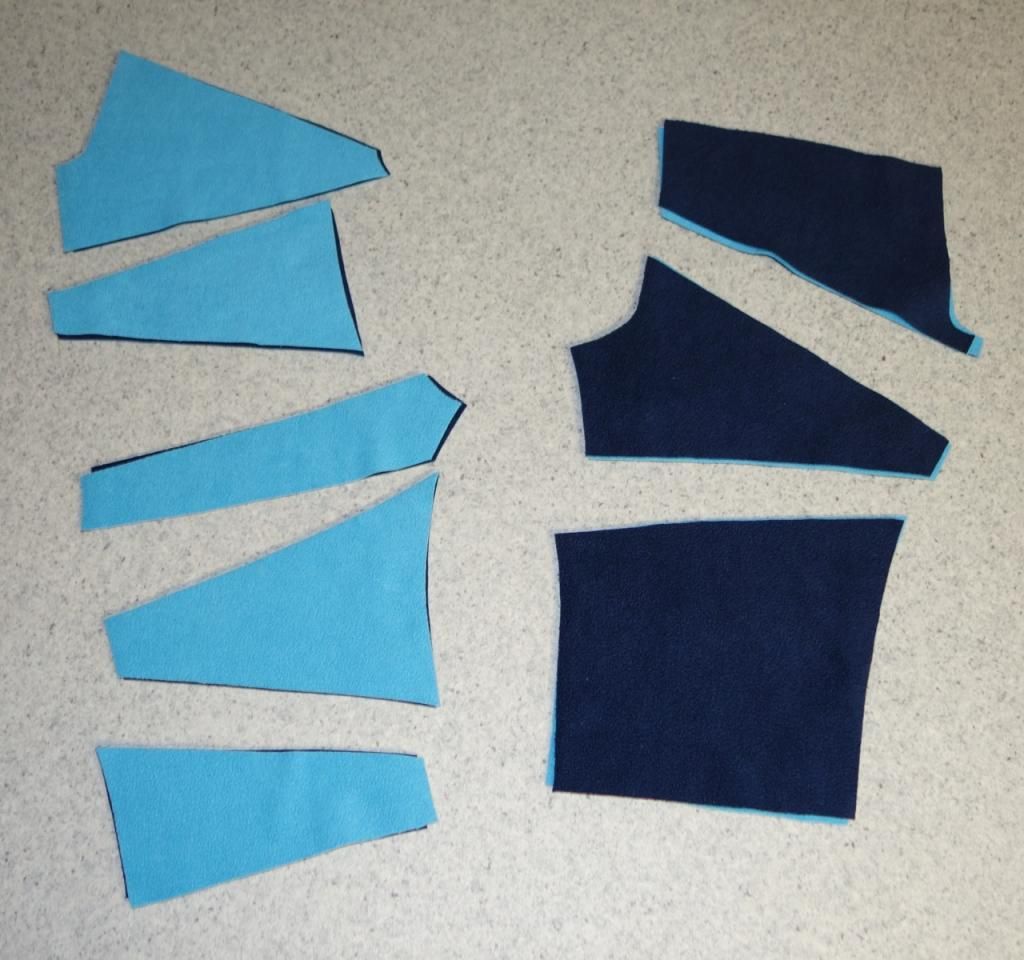
7. and reassemble them
8. If there are a lot of pieces, it may be helpful to mark them so you know how they are supposed to fit together.
9. Sew the pieces together, neatening the edges if necessary, until you once again have four complete trouser legs.
10. Decide which right should go with which left leg. I chose this combination:
Now you can finish up the pants in the way you prefer. This is how I do it:
11. Stack the right and left leg with the right sides facing each other
12. Close the front and back middle seam

13. Close the leg seams in one go from one ankle to the other
14. For the cuffs I'm using the same fabric as for the legs. I use an elastic band, so I don't necessarily need cuff fabric.
15. Cut the cuffs so they are as long as the corresponding pattern pieces plus seam allowance. I prefer broad cuffs, so I'm cutting them 7 cm (3 in) wide for the ankles and 9 cm (3.75 in) for the waist.
16. Fold over the pieces with right sides facing inwards to close the seam to make a circle.
17. Take elastic band in a matching width - I use 3 cm (1.25 in) for the ankles and 4 cm (1.75 in) for the waist. Cut therequired lengths; if you don't have measurements handy, use a pair of well fitting pants for reference.
18. Close the elastic bands into circles.
19. To attach the cuffs, first turn the pants right side out. Then place the cuffs on the pants with the right sides facing inward. Now you can fix them in place with pins, or do it my way and sew them in place close to the edge. That almost guarantees that later you'll catch all the layers and nothing moves out of place.
20. Now pull the elastic rings on the cuffs.
21. Fold over the cuff
22. and sew up around the edge.
23. Something I like to do at the back of the waist is to insert a scrap of fabric with the size stitched on.
24. Fold down the cuffs and voilà!
Two unique and individual patchwork pants.
Of course you can also do this with three or more fabrics, which will give you three or more pairs of pants.
If you have any questions about this tutorial, I'll be happy to answer them. And if you decide to sew some patchwork pants, I'd love to see them!
Until then have fun, and happy sewing :-)
Samstag, 8. November 2014
Baby Romper
I have so far valiantly resisted the urge to sew baby clothes. While they may be all tiny and cute and adorable, they also tend to get outgrown in less time than it takes to make them, and that just isn't my thing.
But now that kid2 has started slowing down a little in the growing department, there's nothing holding me back anymore (except, you know, the lack of time, sleep and mental capacity that comes with having a high-maintenance baby). Especially since I recently discovered my ideal baby garment: the romper suit with buttoned legs. Doesn't have to go over the head (baby approves), allows for easy diaper access (I approve) and there are no socks to kick off (the cats disapprove, because apparently preying on discarded baby socks fulfills some deep instinctual need for them)
You know how people will give you all kinds of "useful" advice, like "when she cries, just drive her around in the stroller (hah!) and if that doesn't work, the car (HAH!)" and of course the perennial favourite "it's such a special time, enjoy it while it lasts (AHAHAHAH- *sob*) and somehow fail to mention that this is a thing that exists? Well. Now you heard it from me.
And since I'm not totally happy with the store bought rompers (too few buttons around the legs, which can lead to the seam gaping open and letting in cold air) it is again up to me and my trusty sewing machines to save the day. I even found a pattern that is almost exactly what I want, so let's take it for a test run:

I'm really happy with how the light blue accents turned out (my own idea, because that's the kind of unfettered creativity I excell in: "whoa, hey, I'ma use TWO colours here! Crazy!") and the buttons almost exactly match the fabric.
Oh, and look!

It's my very first appliqué ever! Doesn't it look ... Well... Let's just say it looks like appliqué and leave it that, okay? I just need to practice a little so my kid doesn't look like she was ambushed by a blind sewing machine wielding Duracell bunny.
For the next one, I'm going to adapt the pattern a little - slim it down at the sides and add an inset in the diaper area, but even as it is, it is absolutely wearable.
My conclusion: Success!
Fabric: Sweat (buttinette)
Buttons: Kam Snaps (snaply Nähkram)
Pattern: Burda 9636
But now that kid2 has started slowing down a little in the growing department, there's nothing holding me back anymore (except, you know, the lack of time, sleep and mental capacity that comes with having a high-maintenance baby). Especially since I recently discovered my ideal baby garment: the romper suit with buttoned legs. Doesn't have to go over the head (baby approves), allows for easy diaper access (I approve) and there are no socks to kick off (the cats disapprove, because apparently preying on discarded baby socks fulfills some deep instinctual need for them)
You know how people will give you all kinds of "useful" advice, like "when she cries, just drive her around in the stroller (hah!) and if that doesn't work, the car (HAH!)" and of course the perennial favourite "it's such a special time, enjoy it while it lasts (AHAHAHAH- *sob*) and somehow fail to mention that this is a thing that exists? Well. Now you heard it from me.
And since I'm not totally happy with the store bought rompers (too few buttons around the legs, which can lead to the seam gaping open and letting in cold air) it is again up to me and my trusty sewing machines to save the day. I even found a pattern that is almost exactly what I want, so let's take it for a test run:
I'm really happy with how the light blue accents turned out (my own idea, because that's the kind of unfettered creativity I excell in: "whoa, hey, I'ma use TWO colours here! Crazy!") and the buttons almost exactly match the fabric.
Oh, and look!
It's my very first appliqué ever! Doesn't it look ... Well... Let's just say it looks like appliqué and leave it that, okay? I just need to practice a little so my kid doesn't look like she was ambushed by a blind sewing machine wielding Duracell bunny.
For the next one, I'm going to adapt the pattern a little - slim it down at the sides and add an inset in the diaper area, but even as it is, it is absolutely wearable.
My conclusion: Success!
Fabric: Sweat (buttinette)
Buttons: Kam Snaps (snaply Nähkram)
Pattern: Burda 9636
Abonnieren
Posts (Atom)